Are you tired of struggling with complicated braids that never turn out quite right? You’re not alone!
Many people find braiding challenging, especially in intricate styles like crisscross braids.
The thought of tangled hair and uneven sections can be enough to make you give up before you even start.
But don’t worry – mastering crisscross braids is easier than you think!
In this blog post, we’ll walk you through simple steps that will have you creating stunning braided hairstyles in no time.
Say goodbye to frustration and hello to gorgeous, perfectly executed crisscross braids.
Get ready to impress your friends and family with your newfound braiding skills!
Preparing Your Hair for Braiding
1. Washing and Moisturizing
- Start with clean, moisturized hair to ensure your braids look neat and healthy.
- Use a gentle shampoo and conditioner suitable for your hair type
- Apply a leave-in conditioner or moisturizer to keep your hair hydrated.
2. Detangling and Sectioning
- Detangle your hair thoroughly to prevent knots and tangles while braiding
- Use a wide-tooth comb or detangling brush to remove any knots or tangles gently
- Divide your hair into manageable sections, making it easier to braid and maintain a neat appearance
3. Necessary Tools for Crisscross Braids
- Hair elastics: Use these to secure the ends of your braids and keep them in place
- Rattail comb: This comb will help you create clean, precise sections and parts
- Edge control: Apply edge control to lay down flyaways and create a sleek, polished look
- Braiding hair: If you want to add length or volume to your braids, use braiding hair extensions
Standard Tips for Criss Cross Braiding
1. Sectioning Hair
- Begin by dividing your hair into two equal sections, from your forehead to the nape of your neck.
- Ensure that the sections are clean and even, as this will impact the final appearance of your braids.
- Use hair clips or ties to separate the sections while working on each.
2. Creating the Braid
- Start on one side of your head, taking a small section of hair from the front hairline.
- Divide this section into three equal parts and begin a Dutch braid, crossing the strands under each other.
- As you braid, gradually add more hair to each section, diagonally toward the opposite side of your head.
- When you reach the middle of your head, continue the braid without adding more hair until you reach the end.
- Secure the braid with a small elastic band.
- Repeat the process on the other side, starting from the front hairline and braiding diagonally towards the first braid.
Criss Cross Braiding Techniques
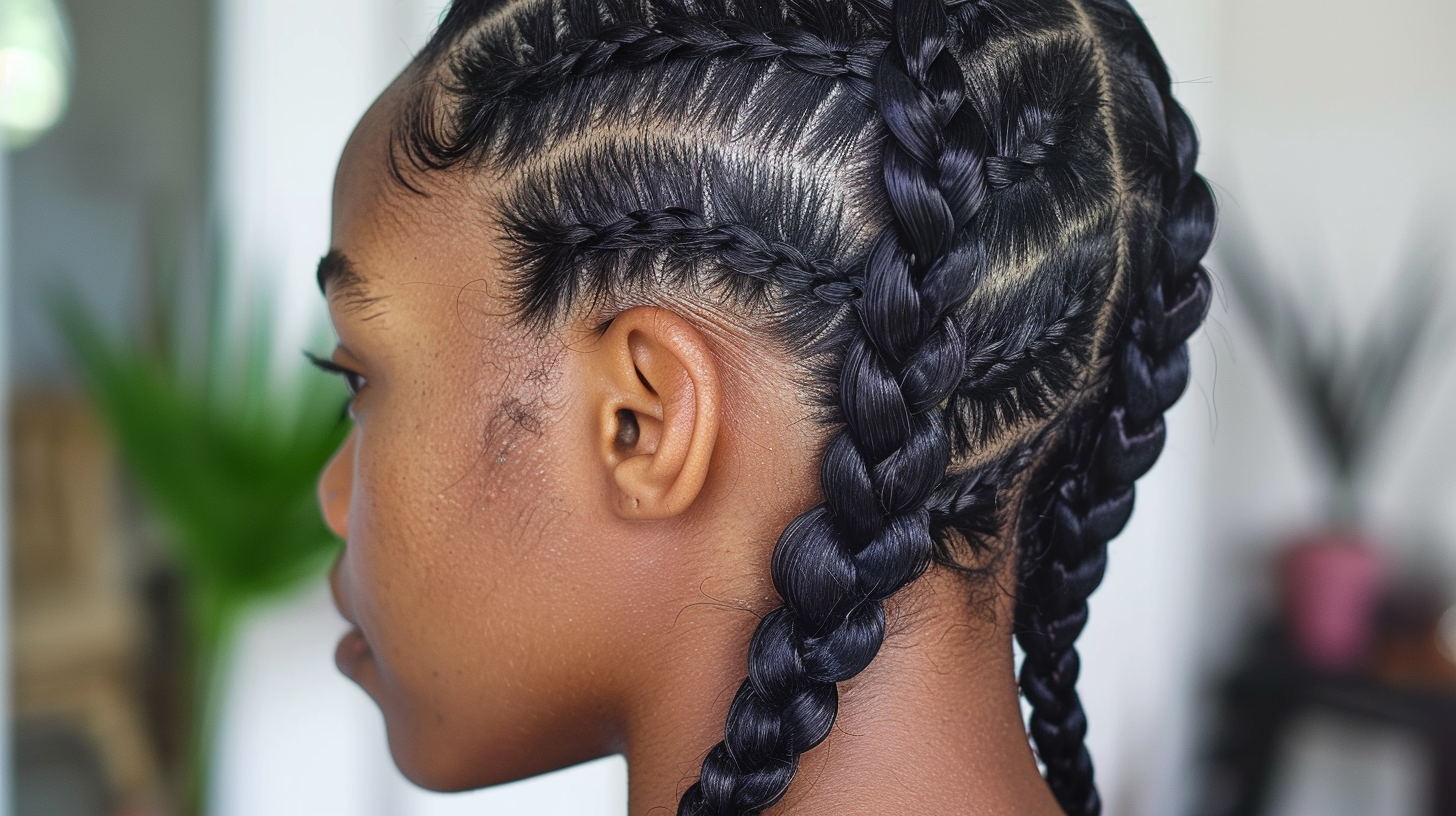
Crisscross braiding is a stylish and practical technique that involves interweaving braids in an “X” pattern.
This trendy style is popular for its versatility, as it can be adapted to suit various occasions and hair types.
Whether short or long hair or thick or fine strands, crisscross braids can be customized to create a unique and eye-catching look.
1. Criss Cross Knotless Braids

Preparing the Hair Base
- Start with clean, detangled hair that has been moisturized.
- Use a rat-tail comb to create a neat, horizontal part across the back of your head, about an inch below your crown.
- Clip the top section of hair out of the way and begin working on the bottom section.
Adding Criss Cross Details
- Dividing a small section of hair into three equal parts from the bottom left corner.
- Begin a knotless braid, feeding in small sections of hair as you work your way up toward the center part.
- When you reach the part, continue the braid without adding more hair, directing it toward the right side of your head.
- Secure the end of the braid with a small elastic band.
- Repeat the process on the right side, braiding towards the left until you reach the center.
- Unclip the top section of hair and create a second horizontal part about an inch above the first one.
Repeat the knotless braiding technique on this section’s left and right sides, directing the braids toward the center.
2. Crossed Dutch Braids

Braid Placement and Starting Technique
- Begin by parting your hair down the middle, from your forehead to the nape of your neck.
- On the right side of your head, divide a section of hair near your temple into three equal parts.
- Start a Dutch braid, crossing the strands under each other as you work towards the back of your head.
- As you braid, gradually add more hair to each section, maintaining a diagonal direction towards the left side of your neck.
Braiding and Crossing
- When you reach the nape of your neck, continue the Dutch braid without adding more hair.
- Direct the braid towards the left side of your head, crossing over the top of your left ear.
- Secure the end of the braid with a small elastic band.
- Repeat the process on the left side of your head, starting the Dutch braid near your left temple and working diagonally towards the right side of your neck.
- When you reach the nape of your neck, continue the braid and direct it towards the right side of your head, crossing under the first braid.
Maintaining and Refreshing Crisscross Braid
- To protect your crisscross braids while sleeping, wrap a silk or satin scarf around your head.
- This will help reduce friction and prevent frizz, keeping your braids neat.
- Alternatively, you can use a silk or satin pillowcase to minimize the risk of damage to your braids.
- To refresh your braids and prolong the life of the style, use a lightweight, alcohol-free hair mist or spray
- To keep your hair moisturized, look for products that contain nourishing ingredients like coconut oil, shea butter, or aloe vera.
- Gently lift the braids and spray the product onto your scalp and along the length of the braids, focusing on any areas that look dry or frizzy.
- If your braids start to look loose or messy, use a small amount of edge control or styling gel to smooth down any flyaways
- Apply the product to your fingertips and gently run them along the length of the braids, focusing on the areas around your hairline and the braids’ intersection points.
- Be careful not to use too much product, as this can weigh down your braids and make them look greasy.
- To prevent your braids from unraveling, regularly check the elastics and replace them if they stretch out or lose grip.
- When replacing the elastics, be gentle to avoid causing damage or breakage to your hair.
- If you notice any fraying or splitting at the ends of your braids, carefully trim the damaged areas with scissors.
- Finally, break your hair between braided styles to prevent damage and promote healthy growth.
- When you remove your crisscross braids, be patient and gentle, using a wide-tooth comb or fingers to detangle your hair. carefully
- Treat your hair to a deep conditioning mask or hot oil to replenish lost moisture and restore your strands to health.
Benefits of Braiding Your Hair
1. Protects Against Breakage
Braids reduce hair breakage by shielding strands from environmental damage and friction. This is especially helpful for those with dry or fragile hair.
Braids keep hair neatly aligned, preventing tangling
Studies show protective styles like braids decrease daily wear and tear on hair strands.
2. Promotes Hair Growth
Braids can help with overall length retention by minimizing breakage and preserving hair length, indirectly promoting growth.
Hair grows in cycles, and by reducing external factors that cause breakage, you can improve length retention over time.
Braiding your hair properly prevents tension at the roots, which can lead to damage and affect growth.
Be gentle when braiding and avoid pulling too tightly to maintain healthy hair growth.
3. Keeps Hair Moisturized and Reduces Frizz
Braids help lock in moisture by keeping hair compact and reducing exposure to air, which can dry out strands.
It’s crucial to moisturize your hair before braiding, which helps maintain hydration longer than wearing it loose.
Consider using natural oils or specific products that hydrate and seal moisture into your hair before braiding.
Overnight treatments or serums can also enhance moisture retention within braids, keeping your hair nourished and frizz-free.
Conclusion
Mastering the art of crisscross braids can elevate your hairstyling game and provide a versatile, trendy look suitable for various occasions.
By understanding the foundational braiding techniques and experimenting with advanced methods like Dutch and French braiding, you can create stunning, personalized styles that showcase your creativity.
Incorporating accessories and learning how to maintain your braids will ensure that your crisscross look stays fresh and polished for days.
Remember, practice makes perfect, so don’t be discouraged if your first attempts aren’t flawless.
With patience and persistence, you’ll soon create enviable crisscross braids that turn heads wherever you go.
Ready to test your new skills? Grab your comb and elastics, and start braiding your way to a chic, eye-catching style today!

