Today, one of the trendiest hairstyles combines braids and weave, bringing together classic and modern styles. This look has become super popular, with over 5 million posts on Instagram showing different versions of it.
However, by merging braids’ timeless intrigue with weaves’ versatility, you get the best of both worlds: a gorgeous statement upfront that seamlessly flows into customizable length and texture in the back.
If you’ve ever struggled with stylist appointments taking forever or being too expensive, I feel you. Doing your hair at home is more affordable and allows you to match your style to your mood better.
The key is finding looks that are achievable for beginners. That’s where “braids in the front, weave in the back” shines.
In this step-by-step guide, we’ll cover suitable hair types, essential tools, sectioning and braiding techniques, and pro tips for blending braids into your weave.
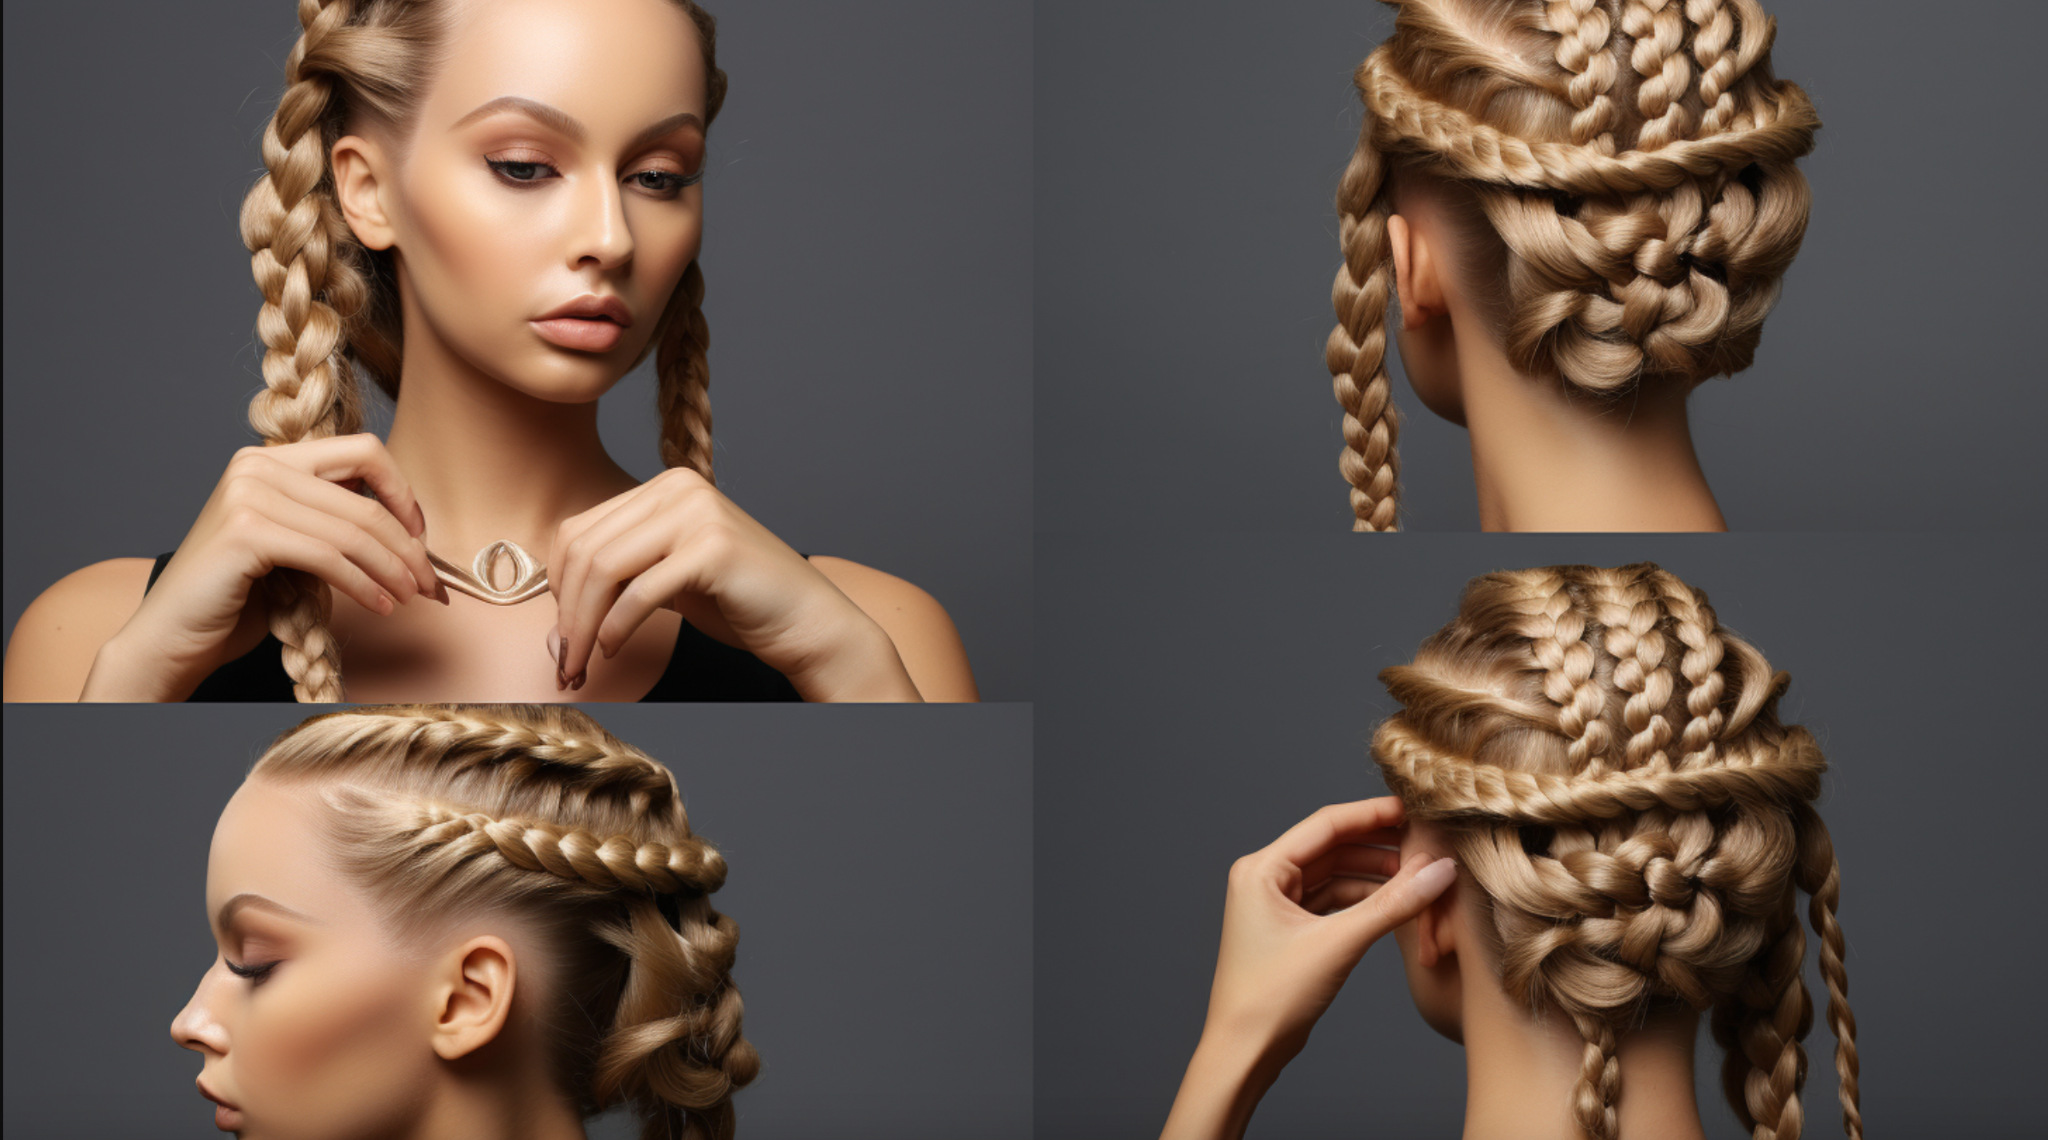
Deciding on Your Front Braid Style
When it comes to “braids in the front, weave in the back” styles, your front braid is a key focal point that sets the tone for your whole look.
No doubt, the range of options can seem overwhelming at first, but once you understand the basics of each braid technique, deciding will be a breeze!
French Braids

For a romantic, free-flowing look that adds softness around your face, French braids are a tried-and-true choice.
These signature interweaving plaits are achieved by gradually incorporating hair in small sections as you braid from the front hairline towards the back.
The result is delicate gathered braids that beautifully frame your features.
Box Braids

If you want to make more of a statement, box braids offer versatile styling opportunities.
These uniform squares create eye-catching geometric designs perfect for modern fashionistas.
Similarly, these braids exude understated elegance with neat, orderly rows – ideal for professional settings or events calling for polish.
Fishtail Braids

For organic texture and dimension, fishtail braids are created by crisscrossing two pieces of hair in a fluid motion reminiscent of the flick of a fish’s tail.
The complex design catches your attention and adds style. Or you can give a fresh spin to the classic look with Dutch braids.
Instead of crossing hair sections over the top, you cross them underneath as you weave.
Ulatimately, by thoughtfully selecting your braid type in front, you craft a canvas that your weave can complement in the back.
So embrace your creative freedom and have fun with your options! The versatility makes “braids in front, weave in back” a look you can truly make your own.
Preparing Your Hair for the Look
Achieving a seamless “braids in front, weave in the back” style starts with proper hair preparation.
- Select extensions that match your natural hair texture and color is paramount for a natural look.
- Choose synthetic and human hair blends that offer lightweight bounce and affordability. For more luxury, Remy and virgin human hair mimic natural hair most closely.
- Once you’ve selected your weave, prepare your natural hair by clarifying and deeply conditioning it to restore moisture and strength in preparation for braiding.
- Apply the conditioner in small sections from roots to ends before rinsing.
- Then, apply a hydrating leave-in conditioner as a detangler, using a wide-tooth comb to smooth knots. Let air dry.
- When hair is 90% dry, prepare it for braiding using a holding spray or gel to smooth flyaways and boost grip.
- Divide clean hair into even rectangles in the front and crown where braids will be placed. Use metal duckbill clips to section hair.
- Then, part the back section for weft placement and make straight evenly, spaced cornrows towards your neck to serve as a base.
- Secure ends with elastic bands. Cover cornrows with a silk cap when not braiding or weaving to maintain freshness.
- Your hair is now prepped and ready for braiding and weaving!
Step-by-Step Braiding Instructions
Once your hair is prepped, it’s time to braid. For this style, let’s create four neat box braids in the front that beautifully complement the weave.
- Start by sectioning the front of your hair into four equal rectangular parts using duckbill clips.
- Take the front right section and divide it into three even strands.
- Cross the right strand over the middle strand once. Then, add hair by picking up a small amount of hair from the right side of the section and add it to the right strand.
- Cross the newly expanded right strand over the middle.Continue in this pattern, adding a bit of hair each time before crossing a strand over, gradually working your way down the section.
- Keep strands tight and crosses smooth. Ensure width remains consistent by adding the same amount of hair each time.
- About halfway down the section, stop adding hair and continue with a simple three-strand braiding technique until you reach the ends.
- Secure neatly with a small elastic matching your hair color.
- Then, repeat the process on the remaining boxes, working from right to left.
- Pay special attention to keeping braids uniform in size for a clean finish. Let braid ends graze your shoulders for a touch of femininity.
- Once complete, use edge control gel to smooth flyaways or short hairs around your forehead and nape.
- Then, set the style by gently misting a lightweight holding spray over your lovely box braids, avoiding direct contact with your eyes and face.
- Accessorize with cuffed metal beads or thread colorful embroidery floss through braids for extra allure. Or wrap braid ends with jewel-toned yarn or ribbon.
- When worn loose, box braids beautifully frame the face with geometric precision. For events, loosely pin braids back with pearl pins for an elegant updo.
So unleash your creativity and enhance your box braids to showcase your flair!
Weaving the Back: Techniques and Tips

With your stunning box braids complete, it’s time to install your weave. For cohesion with the braids, let’s do a straight-back sew-in weave.
- Use wefts matching your braid hair texture and color. For ease, choose pre-selected weave lengths based on your desired finish – 16” for shoulder and 18-22” for mid-back.
- Measure weft width to conceal cornrows best. For fullness, opt for 4-5 wefts per track. Cut wefts to fit tracks exactly using sharp shears for a clean finish.
- Identify your anchor point just behind your braids’ bottom edge. Secure a weft’s top to the braid-adjacent cornrow using a micro ring or silicone-lined clip. Ensure the weft lies flat to the head. The anchor weft should hover just above the nape, not directly on it.
- Thread curved needle with 30lb nylon hair thread. Begin sewing horizontally along the braid line, puncturing the weft’s top channel to connect it firmly to cornrows. Make stitches small (1/4 inch) and tight with 3-4 stitches per cornrow max.
- Move to the track below. Position the next weft’s top edge just to overlap the previous weft’s bottom edge. Sew in and continue placing tracks until the desired fullness is reached. Leave 1/2 inch between tracks for airflow and longevity.
- Angle final tracks inward to taper and round outsides. Curve tracks to contour your head for a natural look. Use fingertips to sweep hair over tracks to blend gently.
- Set the style with dual tension bands fastened horizontally around the front perimeter to secure sides. Mist with holding spray for longevity, then seal the cuticle with serum.
- Regularly maintain style by gently massaging argan oil into the scalp and ends, then re-braiding loose natural hair into cornrows. Avoid harsh manipulation.
So, let your inner stylist shine and blend box braids with a fabulous back weave! It’s easier than you imagined.
Adding Cultural Dimension with Fulani Braids

For an enriched cultural twist, consider incorporating stunning Fulani-inspired braids. Historically worn by Fulani women in Nigeria, these culturally symbolic braids intermix with cornrows and feature handcrafted cowrie shells or metallic beads for decoration. Believe it or not, over 50 distinct tribal groups in Africa wear these braids to display social status!
When I see someone rocking a style rooted in cultural tradition, it piques my interest and instantly intrigues me to learn more. If you also find deep meaning in age-old customs or simply admire the sheer artistry of non-Western technique, you’ll be glad to know adding Fulani braids is doable right at home.
As I instructed earlier, start by parting your hair cleanly from forehead to nape in a deep side part. Complete 1-2 box braids on yourself, then pause to install a Fulani-inspired braid. This will allow it to stand out beautifully.
Now, grasp a slender rectangle section of hair at your front hairline beside your face. As I guide you with the box braid, divide this new section into three strands…
See how relatable examples and a conversational tone make this style more accessible. By proudly celebrating cultures worldwide through your hair, you organically broaden perspectives and spark meaningful connections.
Maintaining Your Braids and Weave

Did you know the average woman spends over $50,000 on hair care in her lifetime? That staggering number made me realize maintaining my style at home is a must!
When I first combined braids and a weave, upkeep seemed daunting. But implementing a simple routine takes the guesswork out of preserving your ‘do.
I’m sure many of you use silk pillows to nurture your tresses overnight. This trick caters to braided hair and weaves by preventing excess moisture loss and friction that leads to breakage.
Lightly misting your braids with rosewater and massaging argan oil into the scalp brings similar nourishing benefits.
When shampooing, be mindful of washing braids more frequently than the weave. Focus scrubbing mid-shaft down and use a silicone serum on the ends to defend my braids from dryness.
Then, deep conditions under heat. For the weave, limit washing to every 2-3 weeks max to maintain the integrity of the sew-in tracks.
As your natural hair grows, preserve your braids’ neat appearance by unbraiding and re-braiding small sections near your edges every 4-6 weeks. Keeping the perimeter fresh helps the style look more neat as a whole.
Make it a monthly habit to check track security yourself and have weaves professionally tightened every 6-8 weeks.
By regularly tending directly to both hair types, you help your braids in the front and weave in back maintain their beauty so you exude confidence each wear!
Creative Variations and Personalization
Did you know box braids date back to 3500 BC when Egyptian royalty incorporated them into complex hairstyles that indicated social status? Even now, they remain a versatile symbol of beauty, culture, and identity.
When I first ventured into braiding, I assumed keeping it simple was best. But I soon discovered just how transformative creative embellishments can be!
If you’re also new to styling, start by playing with braid size and volume at your comfort level. I know when I was learning, mastering jumbo waist-length braids felt intimidating. Beginning with narrower shoulder-length box braids helped me become comfortable with the technique before sizing up.
Once you perfect your box braid base, expand your skills by practicing different textures like bouncy passion twists, rope-like Senegalese twists, or even a fishtail braid! I love intermixing unique plaits with my box braids to keep things fresh and flexible.
To embed your individuality, have fun with vivid colors! Recently, I hand-dyed just the tips of my braids in mermaid blue. But you can go bold by integrating full rainbow synthetic hair or pre-colored braiding packs during installation. Only you can dictate the palette that best celebrates your distinctive flair!
The same goes for your weave in the back…Explore different textures and accessories so your style always feels distinctly YOU! Blend braids and weaves to design a look as dynamic as your imagination allows.
Conclusion
With this comprehensive guide, you have all the techniques needed to achieve the head-turning “braids in front, weave in back” hairstyle.
However, by blending time-honored braiding artistry in front with the modern versatility of weaves in the back, you can craft a style that celebrates your individuality.
Don’t be afraid to make this look your own through creative embellishments and unique variations. Play with different braid patterns, textures, sizes, and colors based on your mood and taste.
Switch up your weave as well to complement your braids. Lastsly, with braids and weaves, versatility and beauty go hand-in-hand.


